

For the uninitiated, Google Tag Manager is a tag management system that stores and manages marketing tags and third-party code snippets.
If you use content management systems like WordPress often, you’ll know that you have the availability to extend their functionality by installing plugins. With this in mind, installing Google Tag Manager on WordPress could open up a lot of options for you as a website owner to deploy and organise 3rd party tools on your website.
There are two methods you can use to install Google Tag Manager on WordPress viz.
- With a plugin and
- By editing the theme files.
Allow us to tell you about both.
Before we begin –
- Set up your Google Tag Manager account here if you don’t have one already.
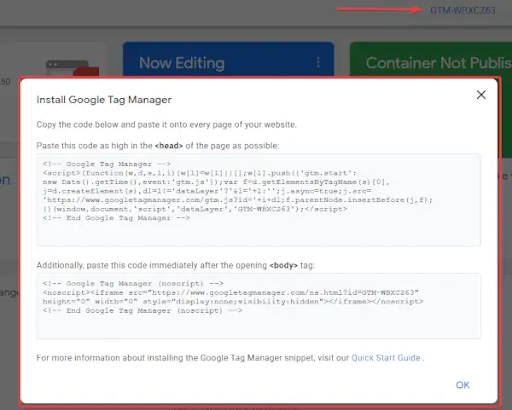
- Now we need to implement the Google Tag Manager code snippet onto your website. If you need to go back to get the scripts just click on Google Tag Manager ID which you can find on the top right corner. After you click on it, a window will pop up.
Adding Tag Manager With a Plugin
We would recommend using the Google Tag Manager for WordPress by Tamas Geiger. To install the plugin,
- Log into your WordPress admin panel.
- Go to Plugins / Add new.
- Search for “Google Tag Manager.”
- Click on “Install now” in the search results next to “DuracellTomi’s Google Tag Manager for WordPress”
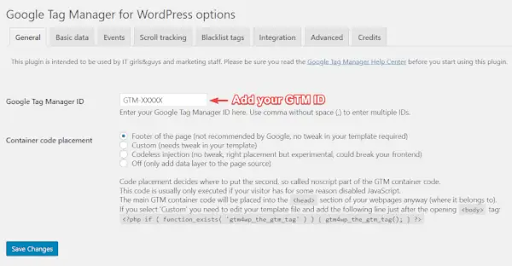
- Next, go to Settings / Google Tag Manager and enter your GTM container ID.
Some things to keep in mind –
Heads up! While using the plugin is a safer option, there’s an important detail you should be aware of regarding the method.
The <head> script must be added correctly to your website because it is critical for enabling all GTM features. The <body> script is essentially an iframe snippet that serves as a fallback for users with JavaScript disabled.
Since WordPress lacks a hook for placing custom code under the body tag, it’s placed in the footer by default.
This default placement is not ideal as it reduces the likelihood of the tag firing promptly. It will still function, but only after the page has fully loaded.
If your setup specifically requires the <body> script to be added within the respective tag, you can opt for the custom injection method. This plugin employs a workaround, but to ensure that everything continues to function smoothly on your site, be sure to test it across various browsers to confirm that it behaves as expected
One of the key benefits of using this plugin is its robust dataLayer integrations, typically accessible through customization options.
In the Basic tab, you can easily send essential data points such as post date, author name, or post title to the dataLayer. These data can then be seamlessly transferred to your analytics tool.
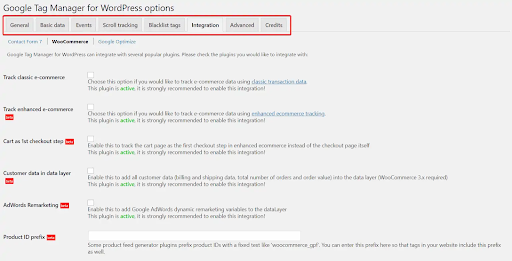
For advanced integrations with plugins like ContactForm 7 or WooCommerce, check out the Integration tab. It’s particularly useful if you want to leverage Google Analytics Enhanced ECommerce Tracking, as it eliminates the need to manually implement the dataLayer.
Additionally, the plugin offers the convenience of injecting the Google Optimize Page Hiding Snippet, ensuring the smooth execution of your experiments
Adding Tag Manager by Editing the Theme Files to Install Tag Manager
- It’s considered best practice to create a child theme for any customizations you wish to make to your theme, such as adding the GTM container code. This approach prevents your changes from being overwritten when a new update becomes available for your parent theme. Editing the theme’s core files directly is generally something to avoid. It’s advisable to consult with your website developer to determine the most suitable method.
- Here’s a simple guide on what you can do (or what a developer would typically do):
- Log into your WordPress dashboard.
- Navigate to the ‘Appearance’ section.
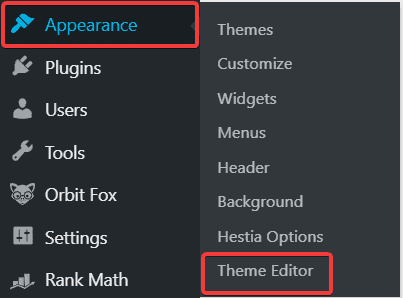
3. Under Theme Editor, you should have access to the theme files themselves.
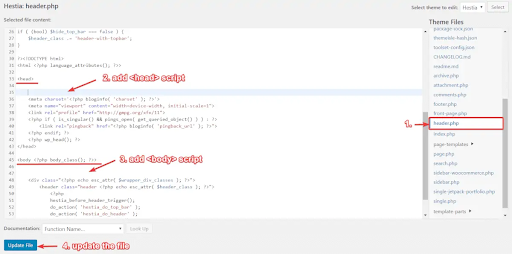
4. After that, look for the theme header.php file and click on it. Here you will find the head tag and the body tag. Let’s copy the first part of the code and place it beneath the opening head tag. The second script part needs to go beneath the opening body tag
5. Finally, click Update File.
Once you’re done with this, check that GTM has been installed correctly. There are a few ways to check this.
Checking if GTM has been installed correctly
Method 1.
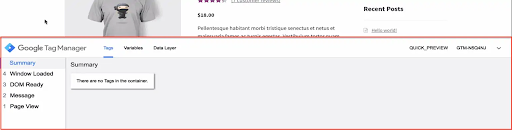
Check using the built-in GTM Preview and Debug Mode. Go into your Google Tag Manager account and click on the Preview button.
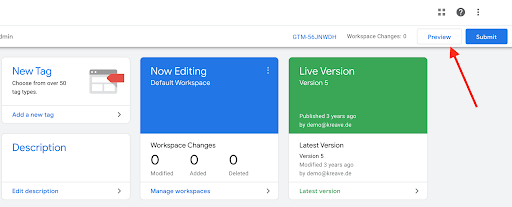
Tag Manager will now put only your browser (not your customers) into a particular state where, when viewing your website pages, you see a little dashboard pop up from the bottom of your screen. So go over to your website and refresh the page to see if this indeed happens. If so, then you have installed GTM correctly. Check a few pages just to make sure.
Method 2.
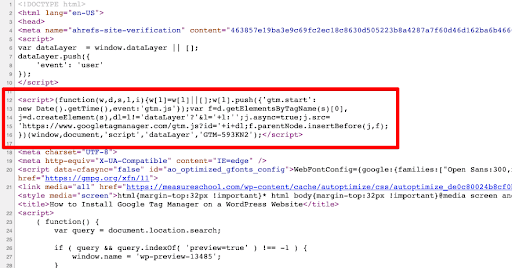
Go to your website and look into your page source to see if the scripts are now placed in the head section of our HTML and beneath the opening body tag.
To do this, right-click and look for the View page source option. Now you could go through other pages and check whether it’s installed in the HTML, but we can also help ourselves with some tools.
Method 3.
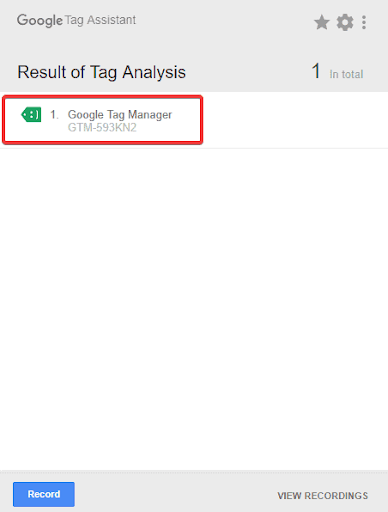
Check with the Google Tag Assistant Extension
The last way is with the tool, Google Tag Assistant. After you install it on your browser, click on the icon to open it. You should see that Google Tag Manager is installed.
Are you struggling to get the most out of WordPress and Google Tag Manager? We can help! Reach out to Kickstart Digital to transform your company’s digital visibility!